Skip to content
Help
  • Easy Subscriptions Website
  • Get Started
  • Pricing

Subscription Management

7
  • How to Set Up Cancellation Retention Flow in Easy Subscriptions
  • Minimum Orders to Cancel subscription
  • Add Remove Products within Subscription
  • Reschedule Subscription Orders
  • Place Order Manually
  • Manage Shipping address and Rates
  • Cancel/Pause/Skip a Customer’s Subscription

Migration

5
  • Import Subscriptions
  • Migrate from PayPal Express
  • Migrate from Authorize.net
  • Migrate from Braintree
  • Standard Migration

Analytics

2
  • How to Access Analytics in Easy Subscriptions
  • Analytics Dashboard

Getting in Touch with Us

1
  • Contact Support for Assistance

Supported Payment Gateways for Subscriptions

1
  • Supported Payment Gateways for Subscriptions

Customer Portal Management

7
  • Custom CSS for Customer Portal
  • Customizing the Customer Portal for Subscription Management
  • Customer Portal Customizations
  • Swap Products from Customer Portal
  • Customer Portal Settings
  • Customer Login Functionality
  • Cancel/Pause/Skip Subscription from Customer Portal

Getting Started

10
  • Managing Customers
  • Placing Test Orders
  • Different Subscription Plan Types
  • Managing Subscription Contracts
  • Theme Installation
  • Customer Management
  • Collection Page Widget
  • Product Page Widget Integration
  • Subscription Group Creation
  • Account Page Widget Integration

Features

15
  • How to Add a New Language to Your Shopify Store & Localize Easy Subscriptions
  • Dynamic Bundle
  • Auto Contract Sync
  • Customer & Order tags
  • Fallback Product
  • Dunning Management
  • Build a Box
  • Fixed Bundles
  • Auto Product Price Sync
  • Cancellation Management
  • Language Translation
  • Tags
  • Subscription Activity Log
  • Product Swapping
  • Bulk Update of Subscription Contracts

Notifications & Email Customization

6
  • Customer Notifications
  • Preferrred Email For admin Notifications
  • Migrate from Stripe
  • Setting Up a Custom Email Domain for Subscription Emails
  • Email Customization
  • Custom Email Domain
View Categories
  • Home
  • Docs
  • Manual Subscription Contract

Manual Subscription Contract

2 min read

How to Create a Manual Subscription Contract in Easy Subscriptions #

The manual subscription contract feature in Easy Subscriptions allows you to create a subscription for a customer directly from your Shopify admin. This is useful for onboarding customers manually or managing subscriptions outside of the standard checkout flow.

Note: Manual contracts can only be created if the customer has a saved payment method in Shopify.

When to Use This Feature #

  • Migrating subscribers from another platform

  • Handling special requests or offline sales

  • Creating subscription plans for VIP customers

  • Offering custom billing intervals or delivery preferences

Step-by-Step Guide #

Step 1: Access the Subscriptions Page #

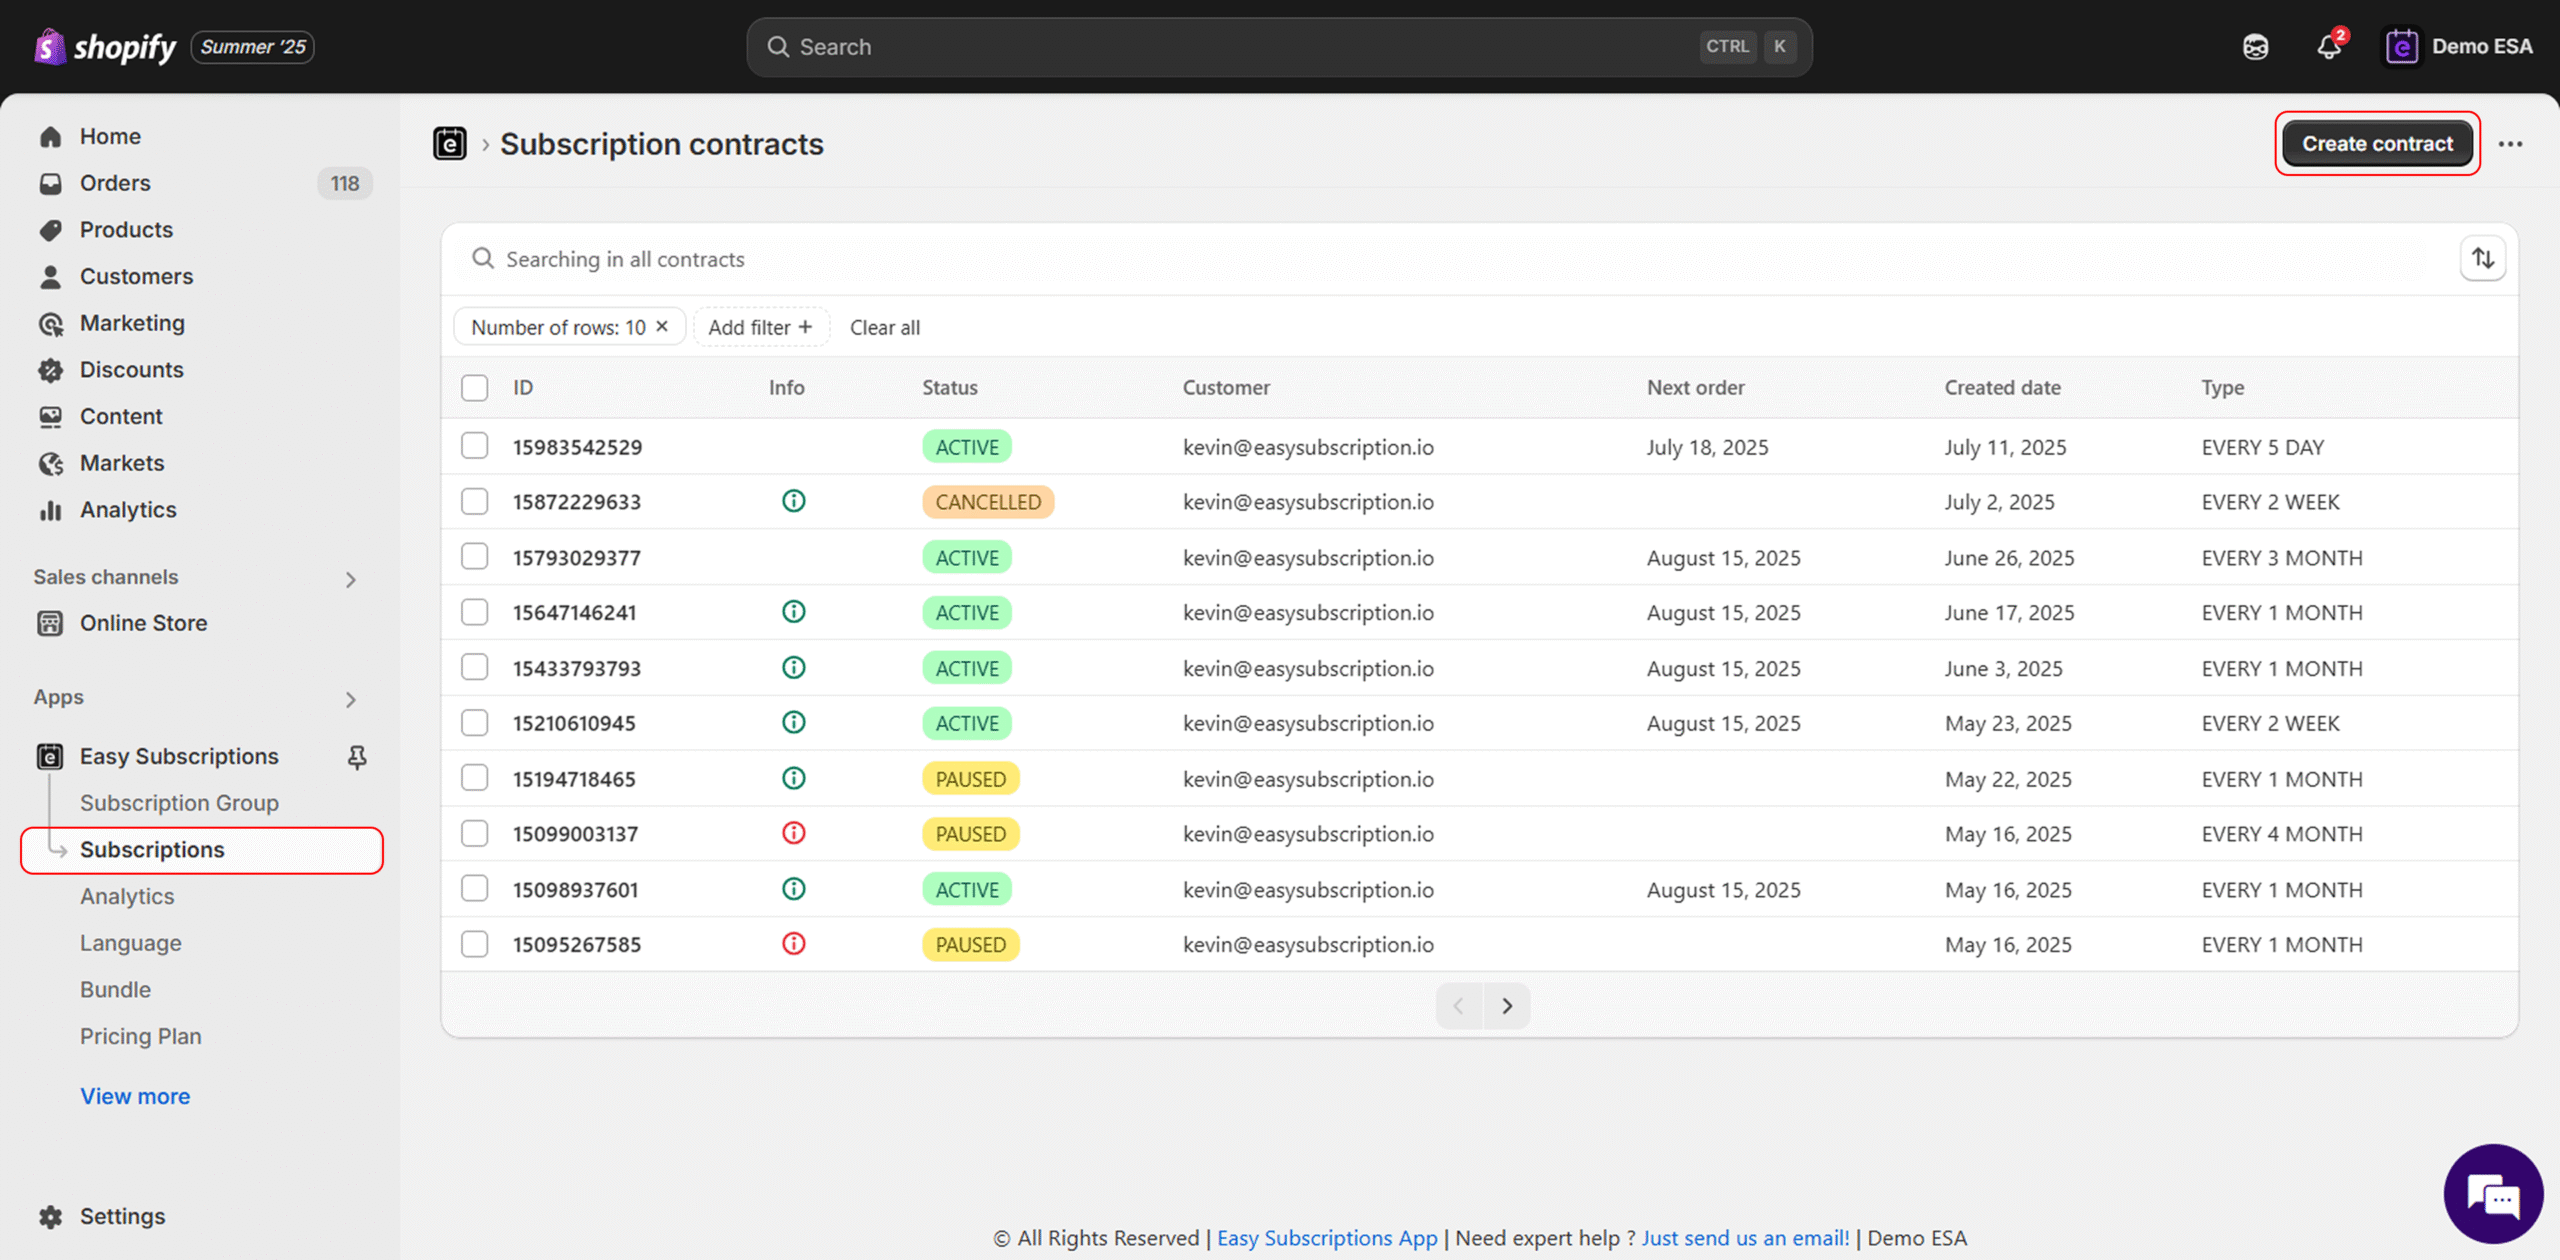
  1. From your Shopify Admin, go to Apps > Easy Subscriptions.

  2. In the left-hand menu, click Subscriptions.

Step 2: Click “Create Contract” #

  1. In the top-right corner of the Subscriptions page, click the Create Contract button.

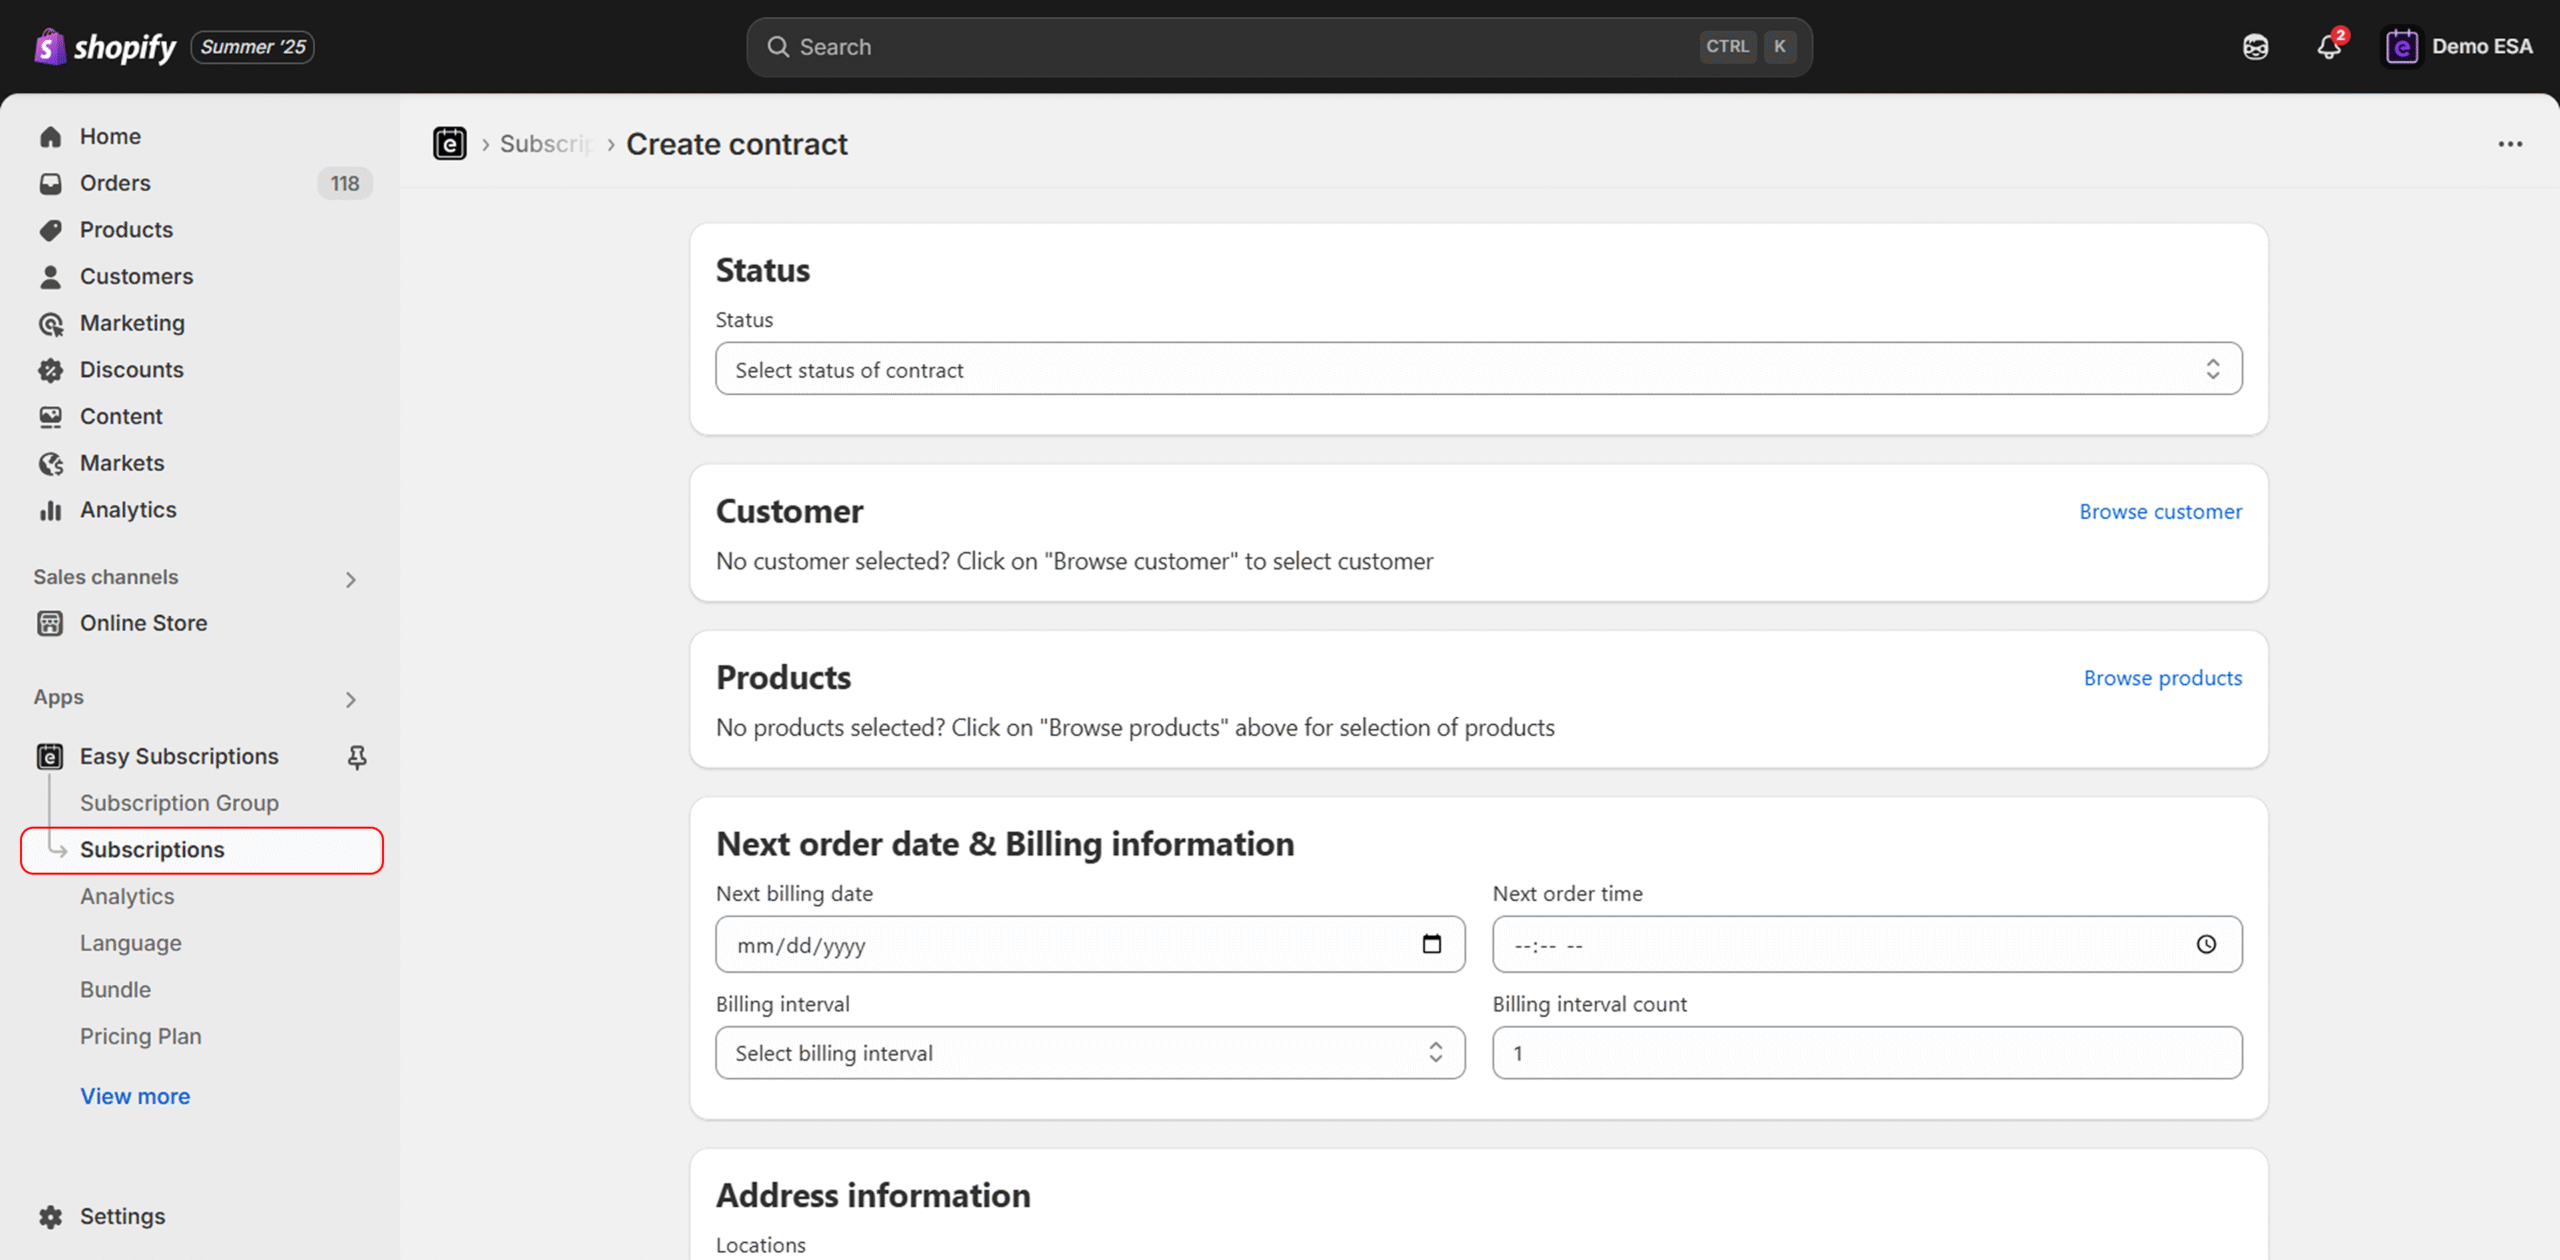
Step 3: Fill Out Contract Details #

Status #

  • Choose the initial status of the contract (e.g., Active, Paused, Cancelled).

Customer #

  • Click Browse Customer to select an existing customer from your Shopify store.

  • ✅ Ensure the customer has a valid saved payment method in Shopify. Without this, the contract cannot be created.

Products #

  • Click Browse Products to add one or more subscription products to the contract.

Step 4: Add Billing Information #

  • Next Billing Date: Select the upcoming billing/order date using the calendar.

  • Next Order Time: Set the time the order should be processed (optional).

  • Billing Interval: Choose how frequently the subscription renews (e.g., every 1 month).

  • Billing Interval Count: Set the frequency number (e.g., “1” for every month, “2” for every two months).

Step 5: Enter Customer Address Details #

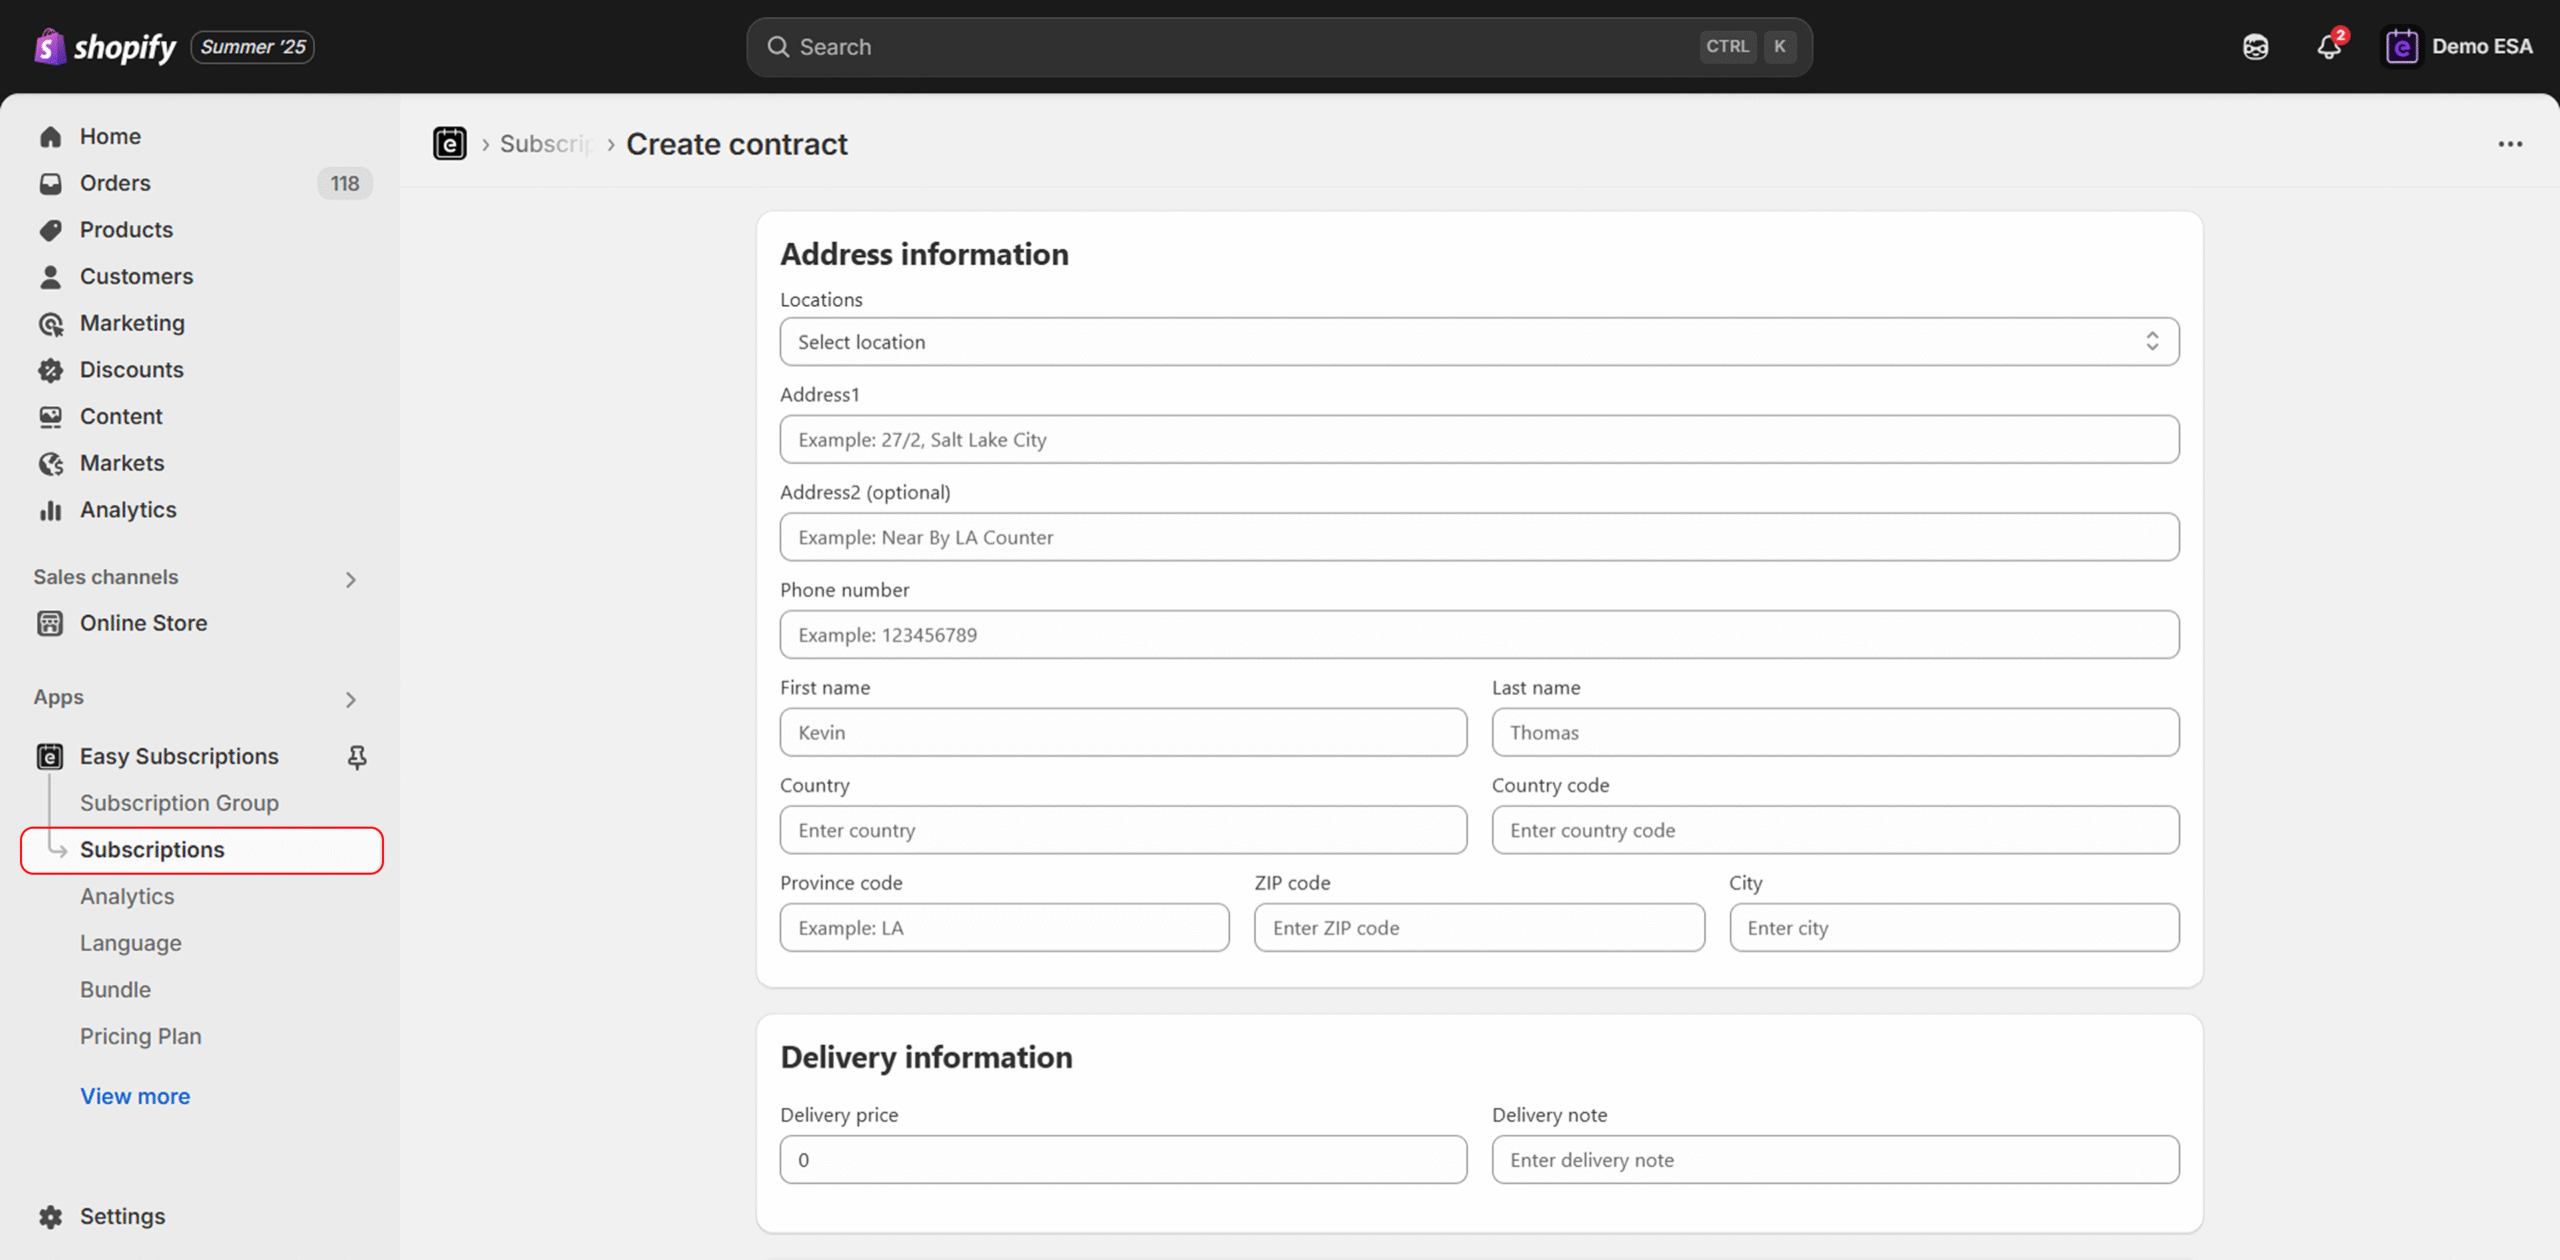
  • Fill in the shipping address, phone number, and country/region.

  • This information is required for order fulfillment and delivery.

Step 6: Add Delivery Information (Optional) #

  • Delivery Price: Enter a custom shipping fee (if applicable).

  • Delivery Note: Add any additional delivery instructions (e.g., “Leave at front door”).

Step 7: Save the Contract #

  1. Review all entered details for accuracy.

  2. Click Save to create the manual subscription contract.

The contract will now appear under the Subscriptions tab and will follow the billing and delivery schedule you’ve configured.

That’s It! #

You’ve successfully created a manual subscription contract using Easy Subscriptions. The system will automatically handle billing, order generation, and notifications based on your setup.
Updated on July 21, 2025

What are your Feelings

  • Happy
  • Normal
  • Sad

Share This Article :

  • Facebook
  • X
  • LinkedIn
  • Pinterest

Leave a Reply Cancel reply

Your email address will not be published. Required fields are marked *

Table of Contents
  • How to Create a Manual Subscription Contract in Easy Subscriptions
    • When to Use This Feature
  • Step-by-Step Guide
    • Step 1: Access the Subscriptions Page
    • Step 2: Click “Create Contract”
    • Step 3: Fill Out Contract Details
      • Status
      • Customer
      • Products
    • Step 4: Add Billing Information
    • Step 5: Enter Customer Address Details
    • Step 6: Add Delivery Information (Optional)
    • Step 7: Save the Contract
  • That’s It!

Product.

  • Changelog

Resources

  • Demo Store
  • Features

Compare

  • Easy vs Recharge
  • Easy vs Bold
  • Easy vs Skio
  • Easy vs Appstle
  • Easy vs Recurpay
  • Easy vs Seal
  • Easy vs Subi

Company

  • About Us
  • Pricing
  • Shopify App Reviews
  • Privacy Policy
  • Blogs

Partners

  • Partner with Easy

Support

  • Help Guide
  • API Documentation
  • FAQ’S
© 2025 – Easy Subscription, All Rights Reserved